TOP BEST TRAINERS IN BLS ACLS courseS
BLS ACLS Training and certification at Charles Institute by AHA. Same day certification.
Original material. BLS-1 day, ACLS- 2 days. Attractive price!
BLS ACLS training at Charles Institute.
Weekly batches of BLS ACLS courses are available at Charles Institute. These courses are certified by the AHA (American Heart Association).
When will I get my certificate?
You can download your BLS ACLS certificate from the AHA’s website, usually on the same day. However, this can take up to 2 days. How to download my certificate?
How long these certificates are valid for?
AHA BLS ACLS certificates are VALID FOR 2 YEARS
Will I get study materials?
Yes. You will get separate study materials for both BLS and ACLS from our branch. This will be provided as Ebooks and will be activated in your account after you make the payment.

Course Fee:
We have branches in multiple cities. The fee charges will vary from place to place.
BLS ACLS course fee in : ₹ 8000/-
BLS Fee in : ₹ 3500/-
Mandatory pretest required?
Yes their is a mandatory pretest which needs to be completed before you attend the ACLS course.
This guide will help you through the steps.
COURSE STRUCTURE
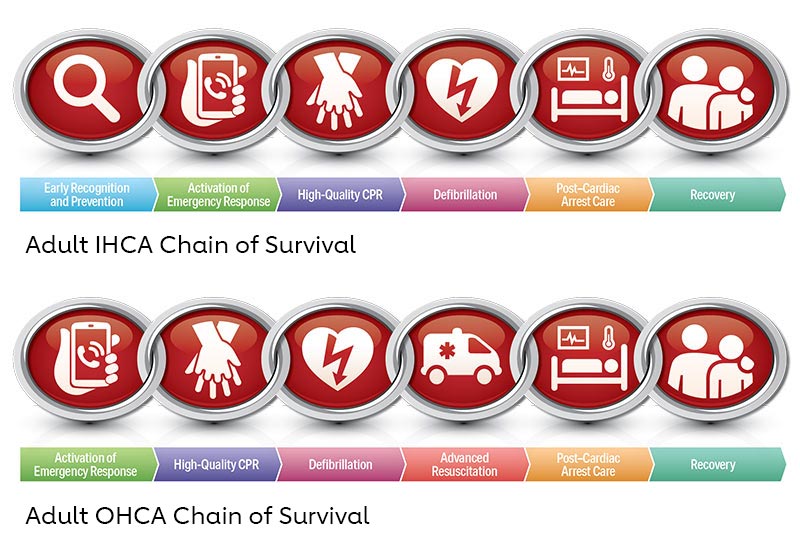
Chain of survival
This is the first topic taught in BLS course. This involves series of actions executed by a BLS provider in order to save a life in sudden cardiac arrest.
Below pictures show the six links in the adults’ chain of survival.
OHCA-Out of Hospital Cardiac arrest
IHCA– In Hospital Cardiac Arrest
For example: If the victim is lying on a railway track, you have to move the victim to a safer zone before you initiate your interventions.

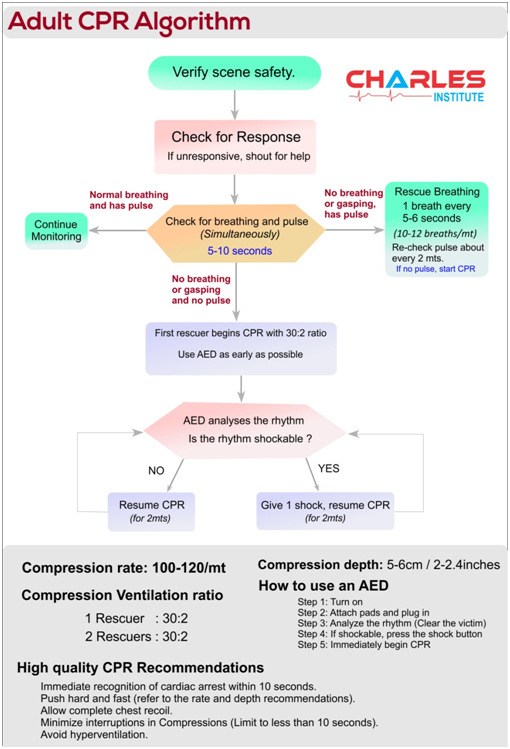
Tap the victim’s shoulder. Shout “Are you OK? If the victim is unresponsive, call for help and check for carotid pulse and breathing (Step 3)
- If the victim is breathing normally and has a pulse – monitor the victim.
- If the victim is not breathing normally and has a pulse – provide rescue breathing at a rate of 1 breath every 6 seconds or 10 breaths per minute.
- If there is no pulse and breathing, or gasping – Begin High quality CPR (Step 4)


- Position the victim face up on a firm and flat surface.
- Position yourself at the victim’s side
- Place the heel of one hand on the lower half of sternum
- Place the heel of the other on the top of the first
- Keep your elbows straight and position your shoulders directly above your hands
- Push hard and fast.
- Compression depth : at least 5 cm or 2 inches (no more than 6 cm or 2.4 inches)
- Compression rate: 100-120/minute
- Chest recoil: Allow complete chest recoil after each compression for ventricular filling and coronary perfusion.


- Interruptions in chest compressions: minimize to less than 10 seconds.
- Compression to ventilation ratio: 30:2
Giving breaths
Open the Airway
Before giving breaths, make sure that you open the airway. Two methods to open the airway are:
- Head tilt Chin lift
- Jaw thrust


Giving breaths using a pocket mask
- Position yourself at the victim’s side
- Place the pocket mask on the victim’s face.(Apex above of the mask and base below)
- Press the top edge of the mask using the index finger and thumb of your hand close to the patient’s head.
- Press the bottom edge of the mask using the thumb of your second hand.
- Place the remaining fingers of your second hand on the bony margin of the patient’s jaw.
- Perform a head tilt and chin lift.
- Take a normal breath and give 1 breath over a second, to produce a visible chest rise.
- Avoid hyperventilation (ventilating too fast or with too much of volume and force.)

Giving breaths using a bag and mask ventilation unit
- A bag and mask device is used to provide positive pressure ventilation to a victim who is not breathing spontaneously.
- A bag and mask device consists of a self inflating ventilation bag and a pocket mask.
- This can be used with or without oxygen.
PROCEDURE
- Position yourself directly above the victims head
- Place the mask on the patients face with the narrow portion on the bridge of the nose
- Make a C with the thumb and index finger of your one hand and press the mask down, against the face
- The three remaining fingers of that hand form an E, which is used to lift the angles of the jaw.(E-C clamp technique)
- Squeeze the mask and watch for a chest rise.
- Give one breath over a second with or without oxygen. Do not hyperventilate.


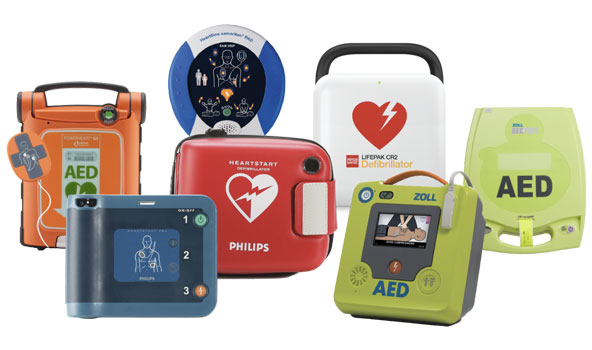
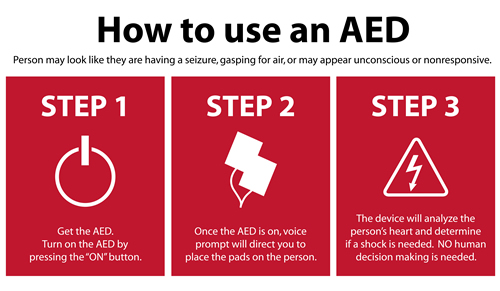
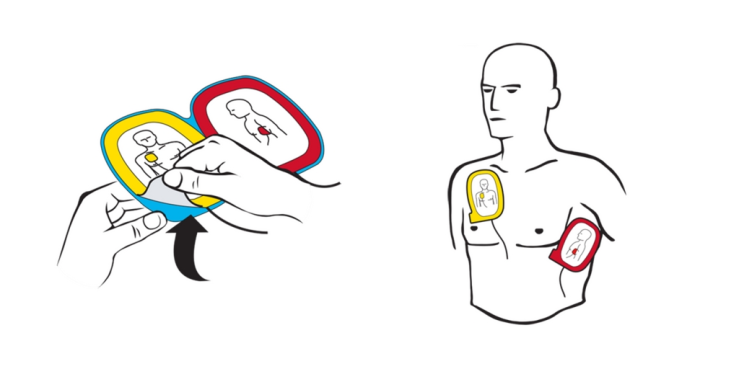
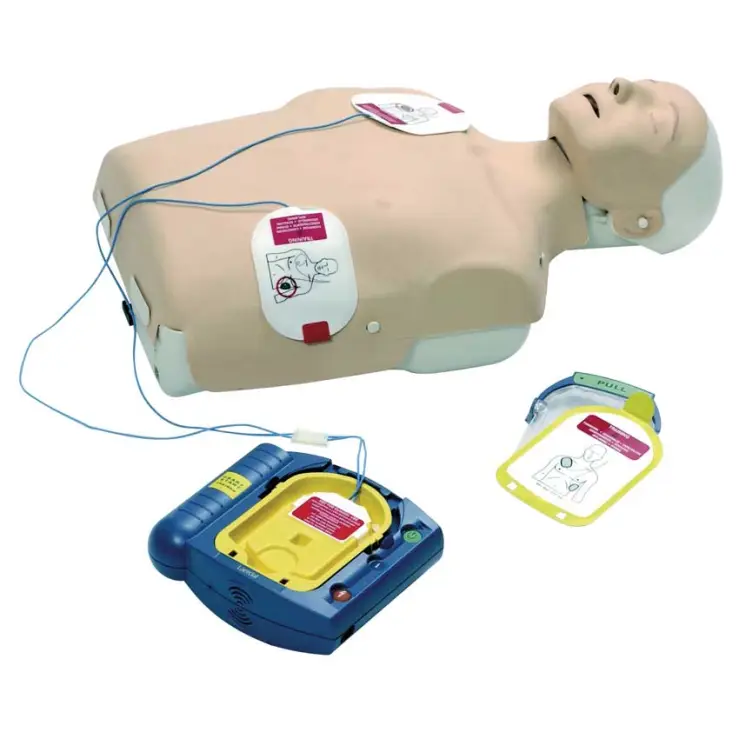
Automated External Defibrillator (AED)
AED is a light weight, portable which can identify a shakable rhythm and then deliver a shock.

Special Circumstances
Excessive chest hair can prevent the effective shock delivery. Use a razor to shave the patient’s chest. If you have 2 sets of pads, attach one set of AED pads and pulling them off forcibly, removing the hair
2. Water or sweat
If the person is submerged in water, pull the victim out and wipe the chest before you attach the AED pads.
Do not place the pads directly over an implanted device. But shock can be given
Remove the patch and wipe the chest before you attach the pads.
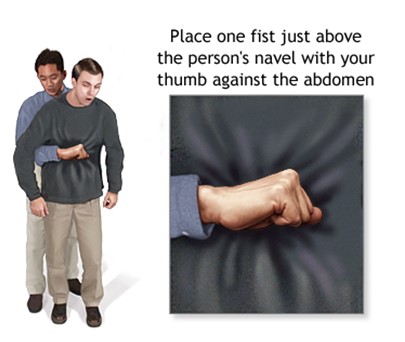
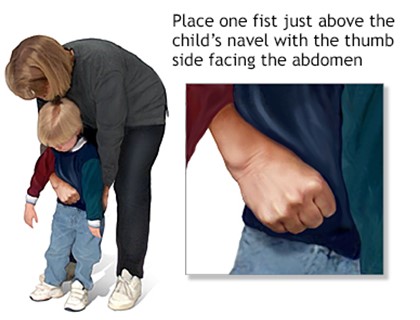
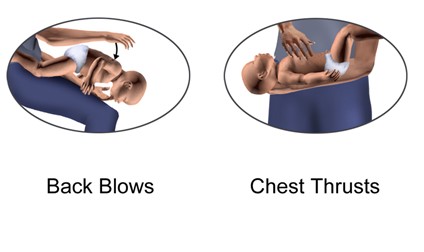
Choking
Victim | Responsive | Unresponsive |
Adult | Abdominal Thrust | Start CPR |
Child | Abdominal Thrust | Start CPR |
Infant | 5 back slaps and 5 chest thrust | Start CPR |
If a choking victim becomes unresponsive, initiate CPR. After 30 compressions, before giving breaths, look for the object in the back of the throat. If present, carefully try to remove it. Do not perform a blind finger sweep.
